After writing about
Uploading Files with Flex and Spring via BlazeDS the next logical step is to write another example of how to browse and download them
This example will show how to get a list of all files and folders from a specific directory on the server, display them in the client's application, browse these directories and/or download specific files.
So you may see that in the previous post I used Flex 4. I really wanted to create this example also with Flex 4, but I had problems with creating an itemRenderer for DataGrid, even found about this
MXDataGridItemRenderer but still. I would appreciate if someone would comment about how to get over this. But whatsoever the example that I'm going to show here is created with Flex 3.5 and we all know how cool is it :)
This time we will start with the Spring implementation. So first we have this variable
private File currentDirectory = new File(System.getProperty("user.home"));
This will keep track of our current directory, as we will browse the content from the client application. I've taken a note from
Helen Neely on my previous post and now the path is OS independent and it points to the user's home directory.
@RemotingInclude
public List<FileInfo> listFiles() {

    File files[] = currentDirectory.listFiles();
    ArrayList<FileInfo> allFiles = new ArrayList<FileInfo>();

    for(int i = 0; i < files.length; i++){
        if(!files[i].isHidden())
        {
            allFiles.add(new FileInfo(files[i].getName(),
                    files[i].length(), files[i].isDirectory()));
        }
    }
    return allFiles;
}
This method takes all the files and folders that are in the current directory that are not hidden (personal likeness) adds them in an ArrayList and returns the list. You can see that here we are creating new objects of type FileInfo, that is just a small class I wrote that has properties like name, size, isDir and data . There is also a corresponding to this class in the Flex project so we can
map them.
@RemotingInclude
public void changeDir(String dir) {
    if(StringUtils.hasText(dir)){
        File tempDirectory = new File(currentDirectory.getPath() + File.separator + dir);
        if(tempDirectory.exists() && tempDirectory.isDirectory())
            currentDirectory = tempDirectory;
    }
}
When called this method with a name of folder we look if there is a folder with this name in our current directory and we change the current directory to it.
@RemotingInclude
public FileInfo downloadFile(String fileName) throws Exception {

    File file = new File(currentDirectory.getPath() + File.separator + fileName);
    FileInputStream input = new FileInputStream(file);
    byte data[] = new byte[(int)file.length()];
    input.read(data);

    return new FileInfo(file.getName(), file.length(), file.isDirectory(),
            data);
}
Basically this creates a new FileInputStream for the file specified by the current directory and filename and reads it's data in a array of bytes and then we return a new FileInfo instance that holds these bytes.
Having these methods we are ready to write our client application.
On creation complete we call
remoteBrowseDownload.listFiles();
place a DataGrid and for it's dataProvider bind to the last result of this operation
<mx:DataGrid id="dataGrid" width="100%" height="100%"
     doubleClickEnabled="true" doubleClick="dataGridDoubleClick(event)"
     dragEnabled="true"
     dataProvider="{remoteBrowseDownload.listFiles.lastResult}">
In the data grid when a user double clicks on a folder we will have to open the folder and display it's content
public function changeDir(dir:String):void
{
    remoteBrowseDownload.changeDir(dir);
    remoteBrowseDownload.listFiles();
}
Where "dir" is the name of the selected folder.
When the item is not a directory, we have to download it. It is done by this function:
public function downloadFile(file:FileInfo):void
{
    for (var i:int = 0; i < downloadedFiles.length; i++)
    {
        if(file.name == downloadedFiles[i].name &&
            file.size == downloadedFiles[i].size)
            return;
    }

    remoteBrowseDownload.downloadFile(file.name);

    file.isDownloaded = false;
    downloadedFiles.addItem(file);
}
We are doing a simple check whether this file is already downloaded and if it's not we call the downloadFile method from our service with only the name of the file and add it in this downloadedFiles array that holds all of our downloaded files. You can see how fast the data is transfered, this is thanks to BlazeDS and AMF.
As this downloading could take longer (depending on the file size), we provide an event handler for the result., that just set the flag isDownloaded to true.
private function onFileDownloaded(event:ResultEvent):void
{
    var file:FileInfo = (FileInfo)(event.result);
    file.isDownloaded = true;
    for (var i:int = 0; i < downloadedFiles.length; i++)
    {
        if(file.name == downloadedFiles[i].name &&
            file.size == downloadedFiles[i].size)
        {
            downloadedFiles.setItemAt(file, i);
        }
    }
}
When files are being downloaded we display them in another grid with a progress bar and when the download completes, a button "save" appears to allow the user to save the file on his file system. To save a file we use the FileReference.save.
public function saveFile(file:FileInfo):void
{
    var fileRef:FileReference = new FileReference();
    fileRef.save(file.data, file.name);
}
Have in mind that use this feature you have to target your application to use Flash player 10.
So basically, that's it. I've also played to add drag and drop support and other stuff, but yo could see by downloading the source.
Download Flex and Spring projects
EDIT: From the Spring project I have made a Maven 2 project, that you can also
download
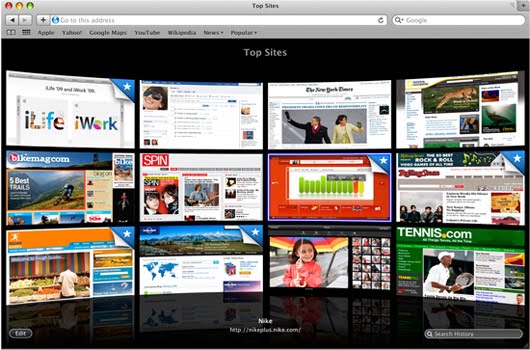
 So what is this? It's a custom flex 4 layout that displays elements as in cylinder. The idea for it I got a long time ago when I saw Safari's Top Sites. Back then I managed to achieve this look and feel with flex using Papervision3D. But I didn't like the way I made it at all. So year later I have decided to try again. This time with the native 3D support of Flash Player 10 and the new layouting in Flex 4 it was quite intuitive and the most proper solution.